New Garden Preparation
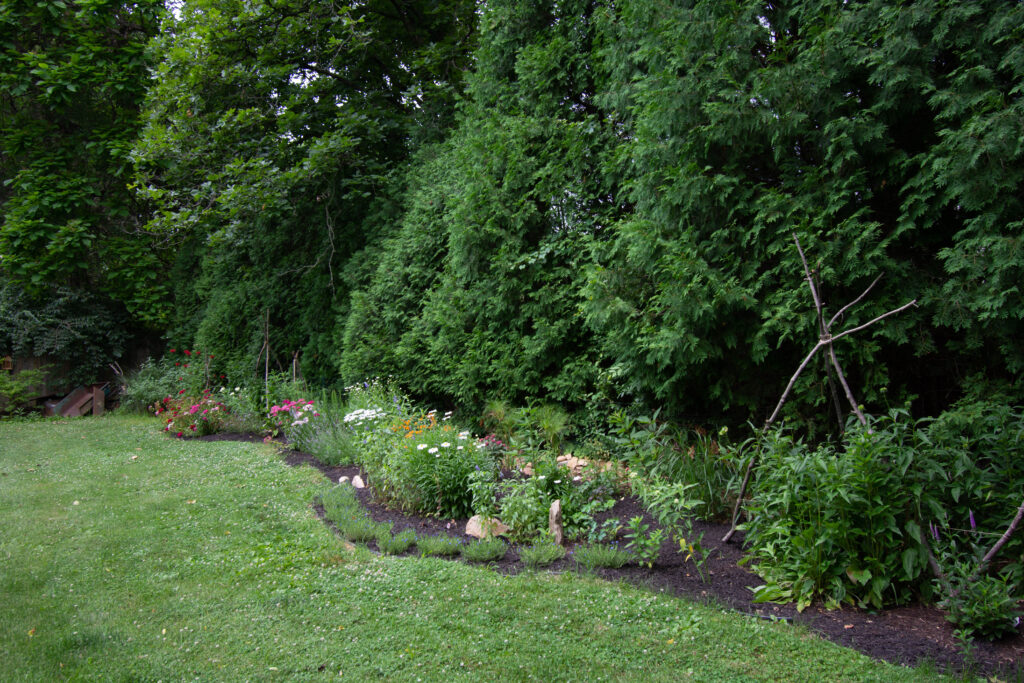
Back in the day (you say that when you don’t want people to think about how old you are – even though everyone knows), when Mike was a freshman at Penn State, his dorm room was very close to the Penn State Arboretum. We went over there more than a few times to admire the trees and the plantings and eat an occasional hoagie that we brought from home. I especially admired the long rows of plants organized with the tall ones in the back and the pretty little ones in the front. I thought, back then, that we could do this along the back edge of our property in front of the long row of arborvitae bushes.
First attempt
Flash forward to my second year of retirement (actually, isn’t that still a flash back). I’m in my yard with a rototiller digging up the sod for my future 130-foot-long, 8-foot-wide garden. It took a while to get all the sod dug up nicely, and after that I spread a bag of wildflower seeds that I got from Lowes. What shot up that first year was pretty weedy, but there were some pretty flowers mixed in. I wasn’t worried. That winter, I had five trays of pollinator plant seedlings growing with seventy plants to a tray. I’m sure the experienced gardeners know exactly what happened next.
The invasive weed called Lesser Celandine that had been lurking under one edge of the arborvitae exploded through my entire garden. It took almost two solid weeks to dig it all up and bag it for disposal. Then a host of other little plants popped up that I didn’t know what they were. I lot were weeds and I dug them up, but I’m sure that I dug up most of the previous year’s flowers. I got my little seedlings planted when it was warm enough and they started to grow. When it got hot enough to be called summer, I noticed that I was also growing the healthiest collection of crabgrass that I had ever seen. These plants were enormous. Five times bigger than my coneflowers and zinnias and ten times bigger than my butterfly weed and salvia. So, I spent more time digging up crabgrass.
The year after that, I needed to spend another week on the Celandine and some additional time on the crabgrass. By then, the coneflowers were getting big enough to actually compete, the butterfly weed had spread some and came up earlier and stronger, and we had added a lot more plants to start to make my weed patch look more like a garden.
What went wrong
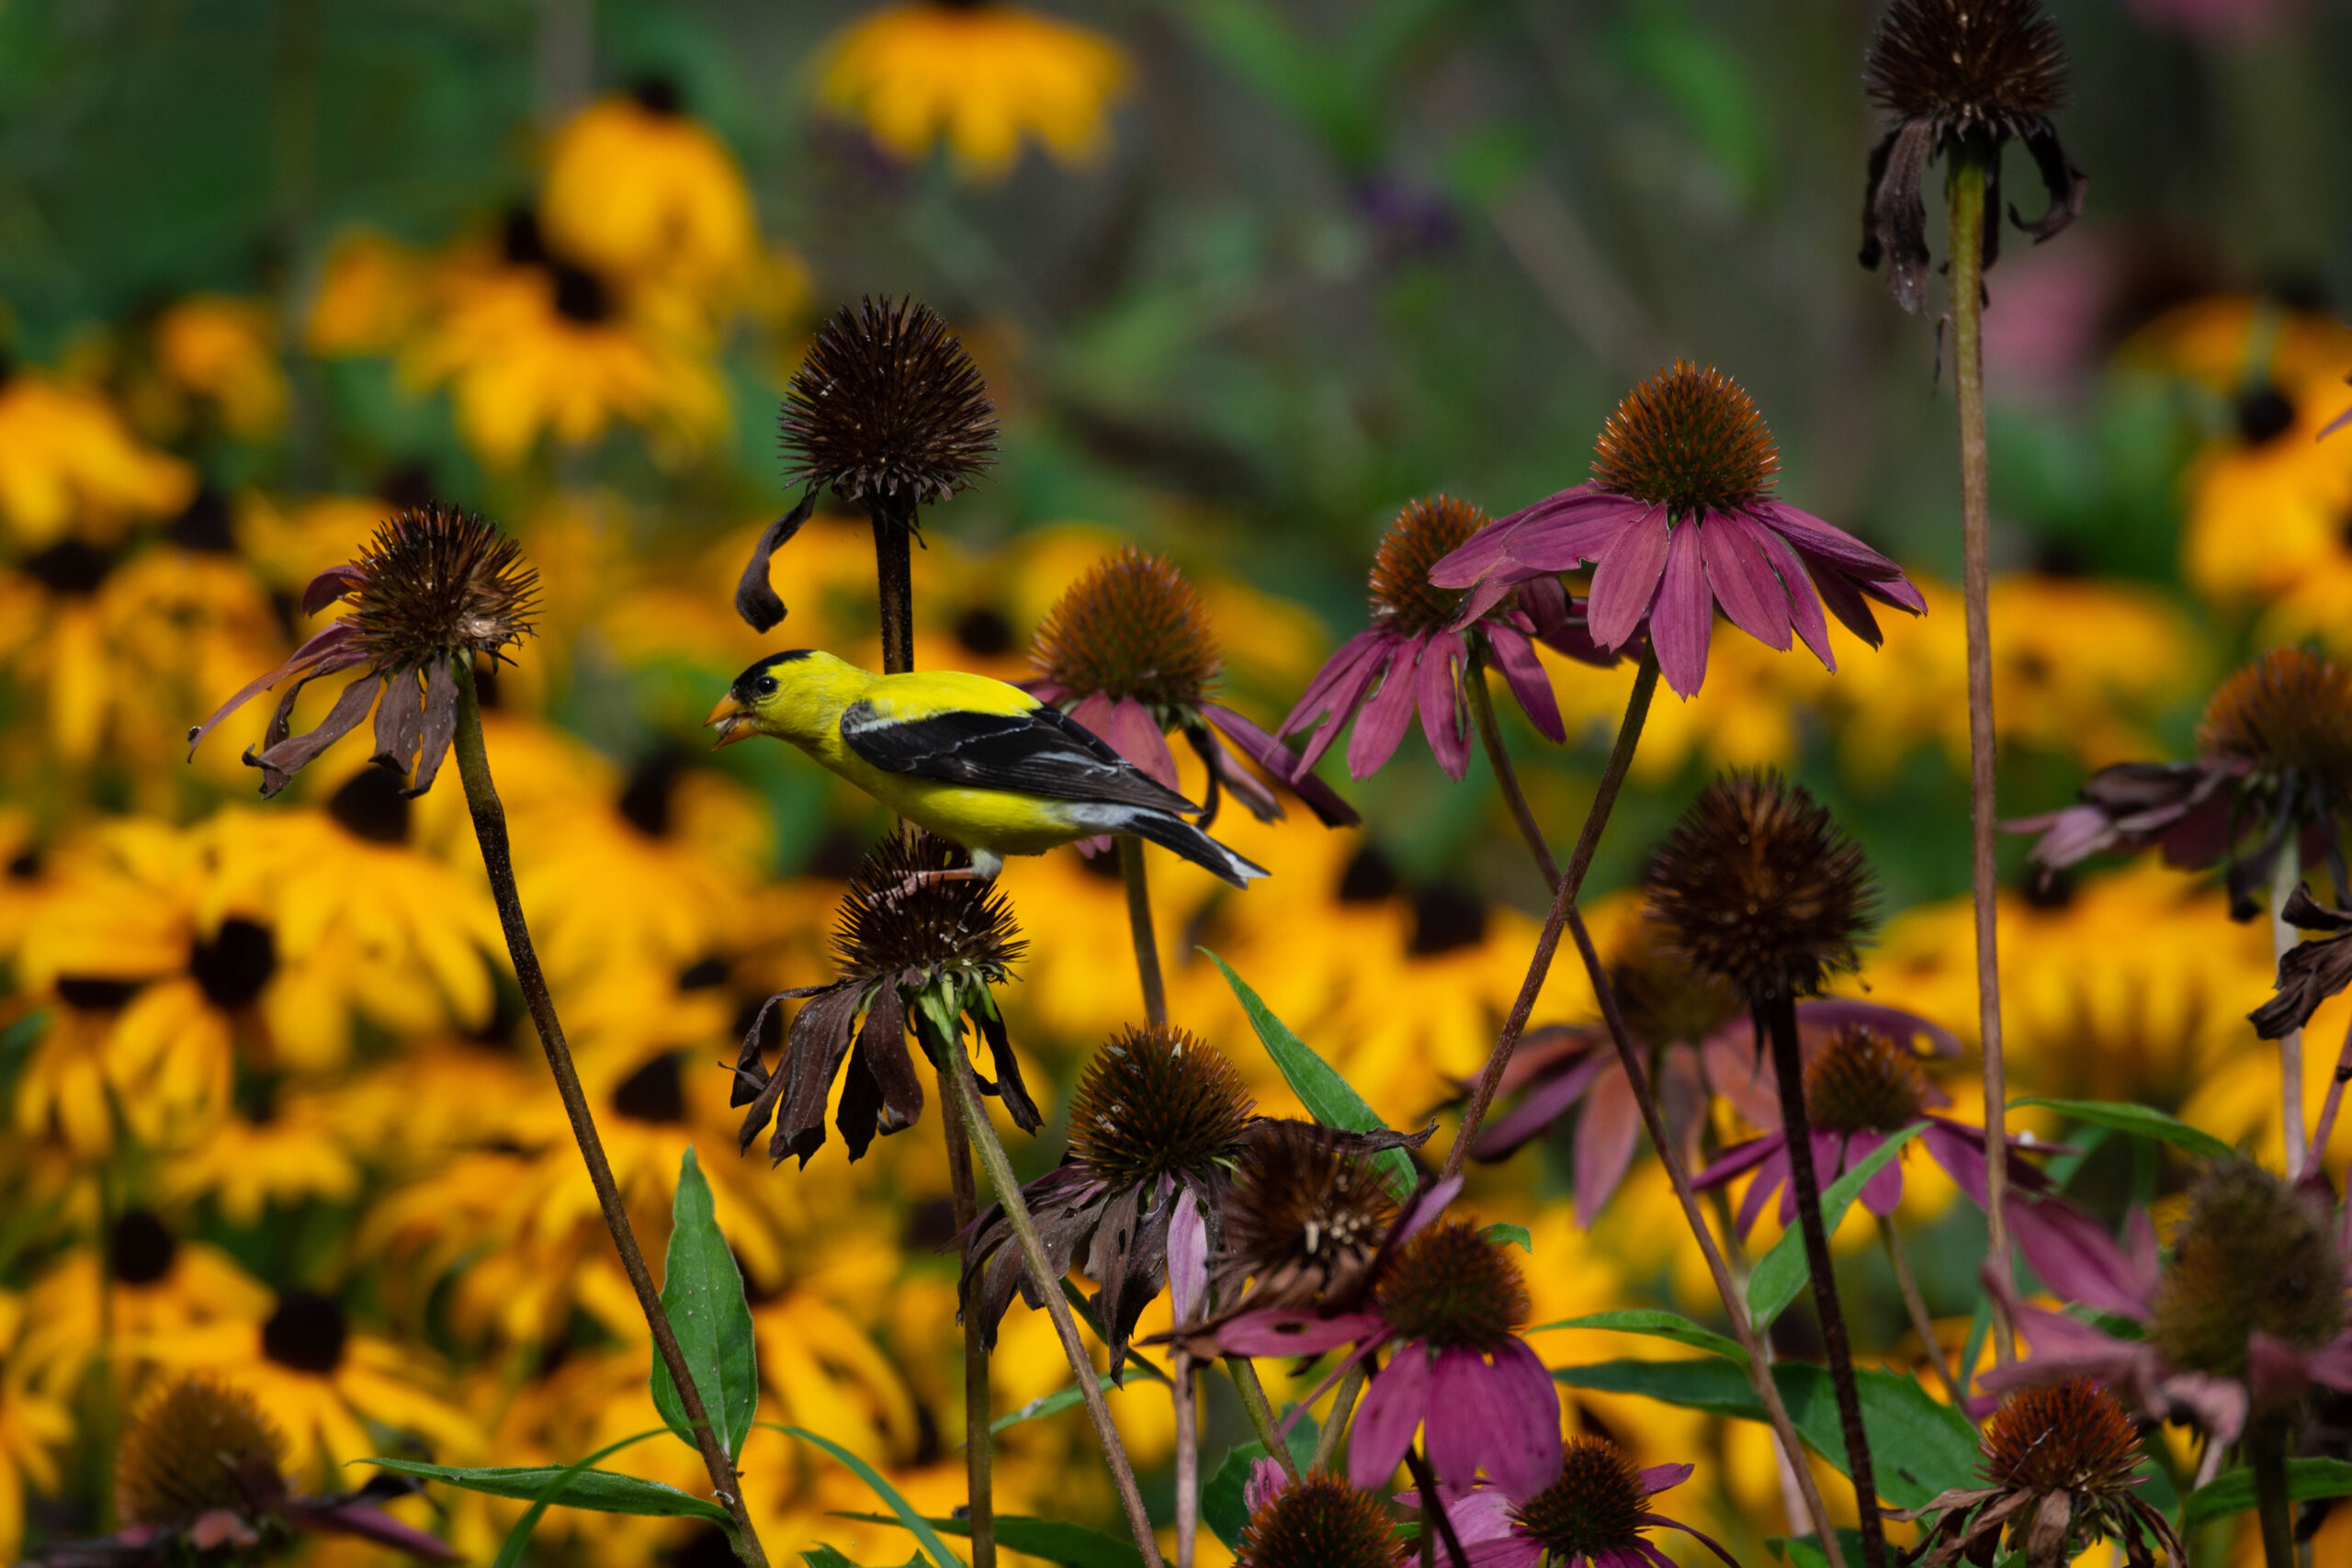
In its fifth year, the garden looks kind of nice. We like it and are hosting caterpillars, adult butterflies, bees, and lots of other insects. We could have done it better and quicker.
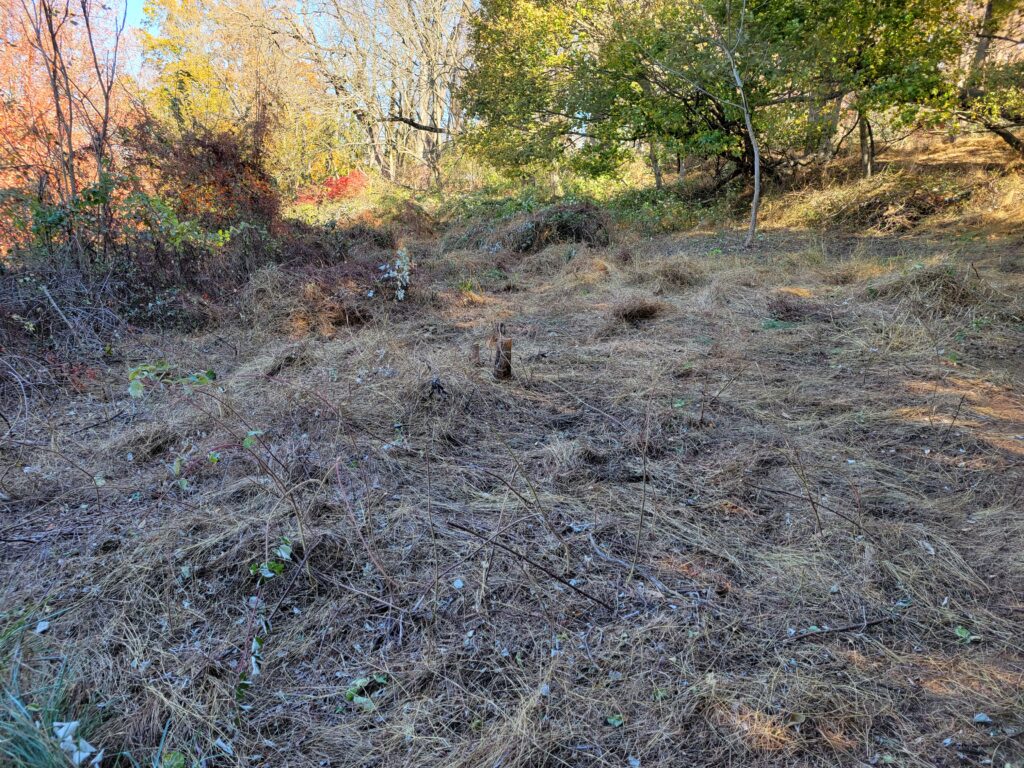
The first mistake was digging up the soil. There are millions of seeds in the dirt waiting to get their chance to compete. By digging up the sod, I exposed the weed seeds to light and gave them a really good environment to proliferate. A much better approach is to prepare the ground by covering it with cardboard and letting that sit over the winter. That smothers all the old growth and keeps the weeds in the dirt from getting started. By spring the cardboard should be deteriorated enough to easily break it up in the spots where the new desirable plants are going. After the first season the seedlings should be established enough to compete with the weeds. Normal mulching and a much more modest manual weeding should be enough for weed control.
My second mistake was throwing a bunch of seeds on the ground and hoping for the best. That just seemed to make my weed control problem worse.
Many of my seedlings did catch on and the descendants of the first Purple Coneflowers, Butterflyweed, and Columbine are still doing well. I could have done better with better plant selection. I also could have gotten more of the seeds to germinate by using cold stratification.
Plant selection
Not all of my plants were perennials (come up every year). That’s okay, if you don’t mind replanting them every year, which can be fun. Two of my original plants were zinnia and salvia. Zinnias are loved by pollinators and very pretty, but they are annuals (only live for one season). Salvia is listed as a perennial but can be an annual in cold regions. Either our salvia did not come up in the second year or we accidentally pulled it up while weeding. (Another tip: put markers in the ground to tell you where the plants are expected to come up in the spring). There are lots of good perennials, so they should be the backbone of the garden.
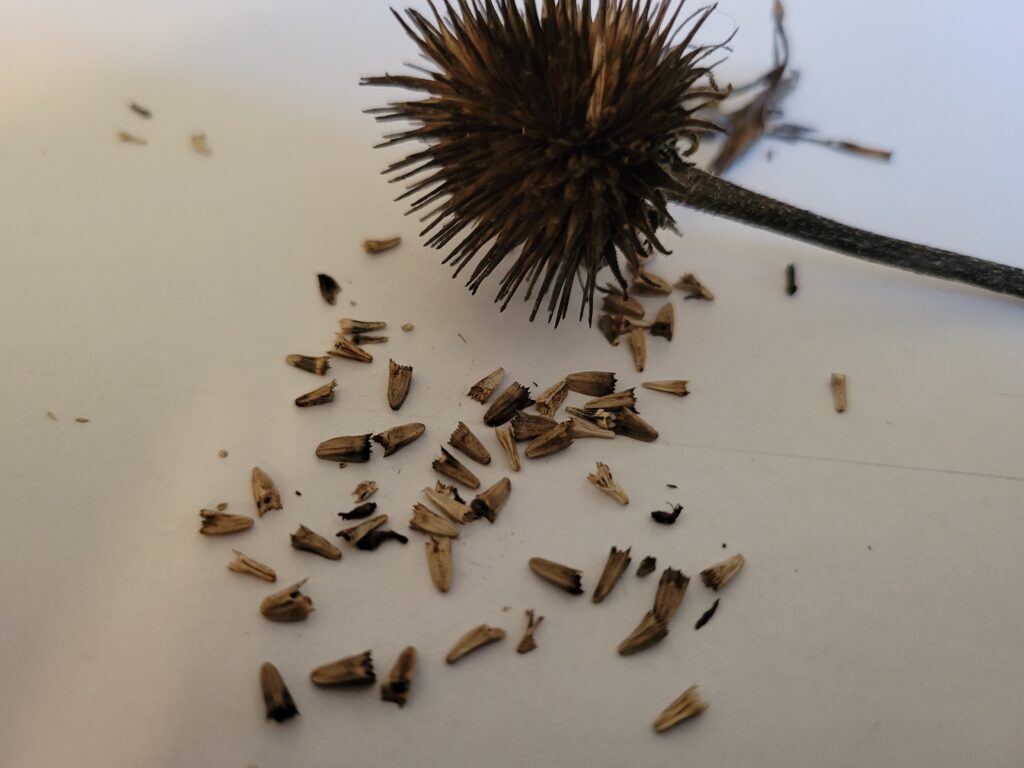
Not all my plants were native. I used butterfly bushes and hyssop and some non-native holly. The mature insects love them, but it is the young insects that need the most help. I could easily have selected similar plants that were native. The only milkweed that I put in was Butterflyweed. I should have also used Swamp Milkweed and Common Milkweed. Eventually I put those in and also Joe Pye Weed and other good plants, but I could have gotten them going much earlier.
Next, I forgot about the deer. Some of my plants were tasty snacks for these animals that seem to be getting plenty to eat on their own. There are some natives that are very deer resistant and others, like coneflowers that seem to be eaten by deer only as a last resort. On the other hand, there are some plants that deer go out of their way to eat.
Also, it is very important to consider the sunlight of your planting spots. Some of my plants, including Bleeding Hearts and ferns, got burned up in too much sun. Others, like Astilbe, didn’t do well in partial shade.
Another thing to look out for is plants that are heavily cultivated. An example of this is the many different colors of Redbud trees. These are produced by grafting unusual cultivars of the plants onto native redbud root stock. The Redbud Native Plant Nursery in Media only sells redbuds that are one hundred percent native with no grafting.
Cold Stratification
Most of the plants native to our region have seeds that require several months of cold in order to germinate. That makes perfect sense. If the seeds get dropped in the ground in summer and sprout before next spring, then they won’t be any good for next year. If just a few cold days are enough to allow them to sprout, that’s also bad. A cold spell in the fall, followed by a warm week might cause them to start growing just before winter. Requiring a solid several months of winter, followed by warm seventy-degree springtime weather, is the perfect adaptation for germination in southeast Pennsylvania. It makes sense.
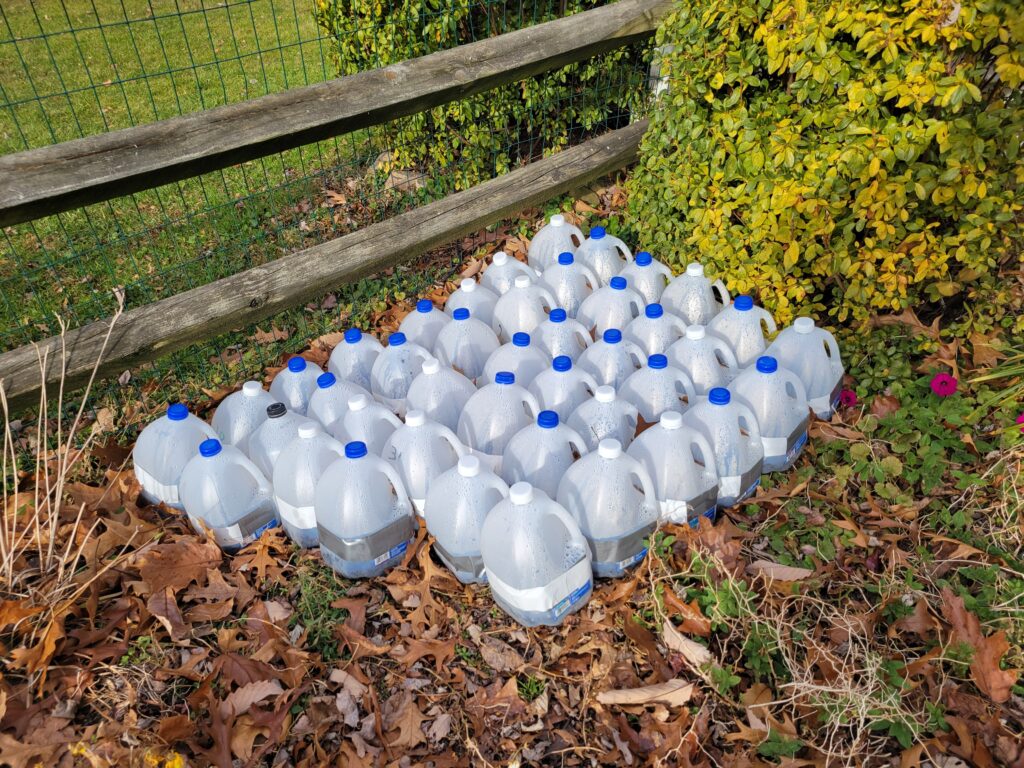
There are several ways to mimic the warm/ cold / warm cycle. Leaving your seeds in a mouse proof container in your garage or shed for the winter should work. Putting them in your refrigerator for a month or two has some issues, but that also is a common technique. Making miniature green houses with empty plastic recycled gallon jugs has the advantage of closely mimicking the natural process to get hardy new seedlings in the spring. That’s the technique that we are trying this winter.
Steps to plant your new garden
- Select your site.
- Prep the ground by cutting down the heavy weeds and mowing the grass. Then cover it with cardboard for the winter. You may need to but something heavy on top of the cardboard to keep it from getting blown away.
- Make a plan for what you intend to plant. Use the info about how far apart to space your plants to figure out how many plants you will need.
- To keep your costs down, you can start your garden from seeds. Either gather your seeds from native plants that you know what they are or buy them. They are readily available from online vendors. Read the info carefully to make sure that you are getting the varieties that you want.
- Cold stratify your seeds, if that is required for your seeds and your environment. This is outlined in “Making little greenhouses”.
- In spring, when the seeds start to sprout, check them every day or two to make sure that they aren’t drying out. Unscrew the caps of the jugs and spritz them with a water bottle. When they are a few inches tall, transfer each plant to its own little planting box. These are really cheap and available online. I spent about five cents apiece for mine. I need a lot and bought a thousand of them, but you can buy less. I plan to reuse them again and again.
- When your new seedlings are ready for planting in the garden, the cardboard should be almost disintegrating on its own. You can leave it on the ground and make holes in it where the new plants are going. After planting, put down some mulch around the plant.
- Weed. Enjoy.

Making little greenhouses
- Collect some plastic gallon jugs with caps. The jugs should be at least a little translucent to let in some sunlight.
- Cut the jugs approximately in half. The cut should be below the handle. You are going to tape the pieces back together (last step), so after cutting a jug, number its top and bottom pieces with a number. Use paint or a waterproof permanent marker.
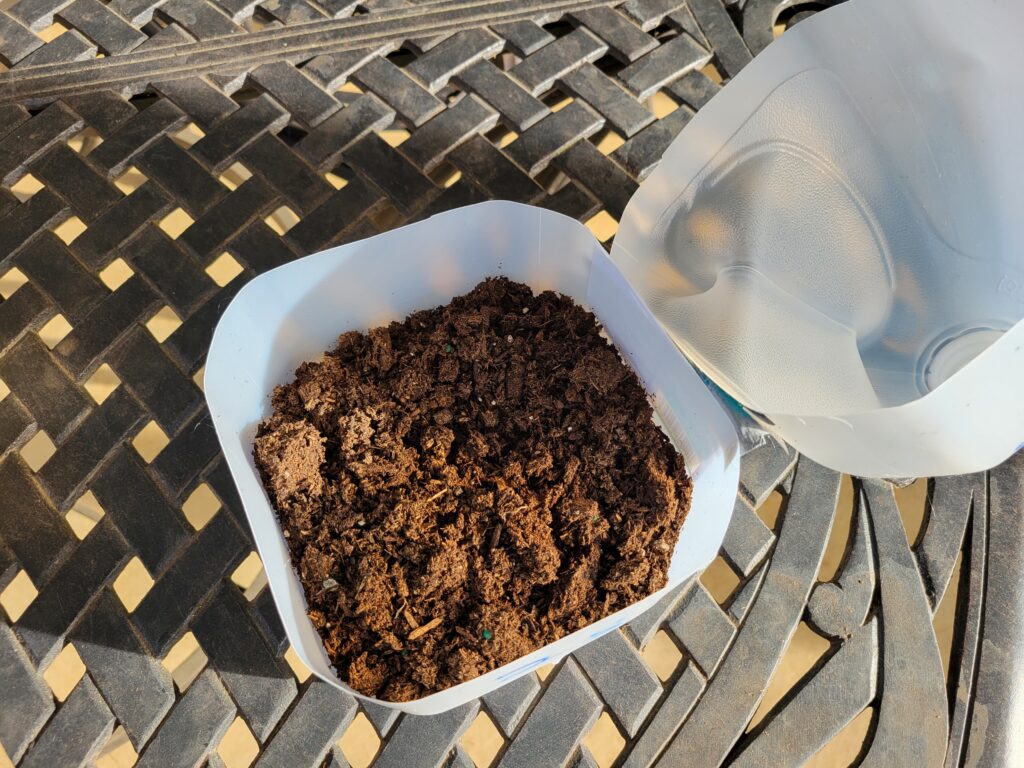
- Fill the bottom parts of the jugs with planting soil. I used a big bag of indoor/outdoor starting soil from Lowes. This isn’t ideal because it may hold too much moisture and has fertilizer. I’ve got my fingers crossed that this soil will work, but I have my concerns. One recommendation is to avoid soil mixtures with fertilizer because that could burn the seeds. I also read a good recipe for making your own starter soil and used that for a succulent terrarium. The recipe is about equal parts of compost, peat moss, vermiculite, and perlite. If you have the time and want to save a few bucks. Mix your own.
- Mix in enough water to make the soil moist. Since this is my first time doing this technique, I wasn’t sure how much water to add. I made the soil pretty wet and mixed it thoroughly.
- Spread your seeds on top and cover with the recommended amount of dirt. Coneflowers like a quarter inch. Milkweed likes a light dusting. Joe-Pye weed needs light to germinate, so don’t cover at all. I started off with only nine milkweed seeds per jug, thinking that they needed space to grow. That was wrong. Since these are going to get replanted into individual containers shortly after sprouting, you can put a lot of seeds in each jug. Twenty milkweed seeds per jug seems about right.
- Write down what seeds are in each different jug.
- Tape the tops of the jugs back to their bottoms with duct tape or packing tape.
- Set them outside in a spot with morning sun and afternoon shade.